Are you considering upgrading to a smart thermostat for your home? If so, look no further than the Sensi Thermostat. In this article, we will explore everything you need to know about the Sensi Thermostat installation process, including its benefits, tools needed, step-by-step guide, troubleshooting common issues, connecting it to Wi-Fi and smart home systems, programming and setting it up, maximizing energy savings, and the options for professional installation versus DIY installation.
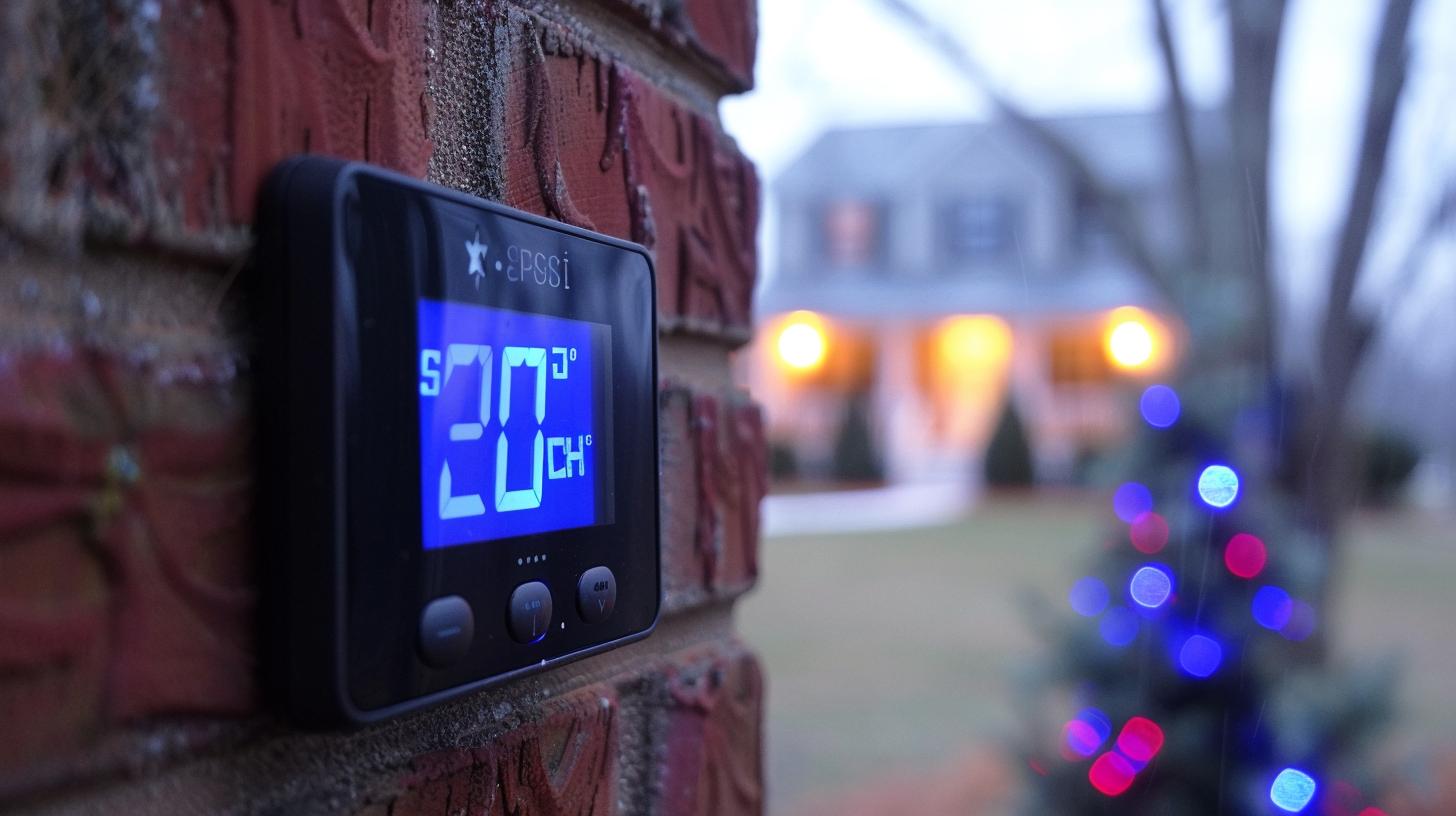
The Sensi Thermostat is a popular choice among homeowners looking to enhance their home’s energy efficiency and comfort while also embracing the latest in smart home technology. With its user-friendly interface and customizable settings, the Sensi Thermostat offers a seamless and convenient way to manage your home’s heating and cooling systems.
One of the key benefits of installing a Sensi Thermostat is its ability to help you save money on your energy bills. By allowing you to remotely control your home’s temperature settings and create customized heating and cooling schedules, the Sensi Thermostat helps minimize wasted energy when no one is home or when specific areas of the house are not in use.
Before diving into the installation process, there are several important factors to consider. From compatibility with your current heating and cooling system to ensuring a stable Wi-Fi connection for remote access, taking these considerations into account will help ensure a successful installation and optimal performance of your new Sensi Thermostat.
Stay tuned as we delve into the tools and materials needed for Sensi Thermostat installation as well as provide you with a detailed step-by-step guide to help you navigate through the process seamlessly. Whether you’re a seasoned DIY enthusiast or prefer professional assistance, we’ll guide you through the entire installation journey so that you can enjoy all the benefits that come with having a Sensi Thermostat in your home.
Benefits of Installing a Sensi Thermostat
The Sensi thermostat is a popular choice for homeowners looking to improve their energy efficiency and overall comfort in their homes. With its easy installation process and user-friendly interface, the benefits of installing a Sensi thermostat are numerous. Here are some of the key advantages that come with choosing a Sensi thermostat for your home:
- Energy savings: One of the primary benefits of installing a Sensi thermostat is the potential for significant energy savings. By programming your thermostat to adjust temperatures based on your schedule and preferences, you can reduce energy consumption and lower your utility bills.
- Convenience: The Sensi thermostat is designed to be easy to use, with straightforward controls and the ability to adjust settings from anywhere using a smartphone app. This convenience allows you to make quick changes to your home’s temperature without having to get up and manually adjust the thermostat.
- Comfort: With precise temperature control and customizable scheduling options, the Sensi thermostat can help ensure that your home remains at a comfortable temperature throughout the day and night. This can lead to a more enjoyable living environment for you and your family.
In addition to these primary benefits, there are other advantages that come with choosing a Sensi thermostat. For example, some models are compatible with smart home systems such as Amazon Alexa or Google Assistant, allowing for voice control of your HVAC system. This integration can enhance the overall functionality of your home automation setup.
Furthermore, certain Sensi thermostats offer features like geofencing, which uses your smartphone’s location to automatically adjust the temperature when you leave or return home. This feature can help further maximize energy savings by ensuring that your HVAC system isn’t running unnecessarily when you’re away.
Ultimately, the decision whether or not to install a Sensi thermostat comes down to weighing these benefits against the initial cost and effort of installation. However, for many homeowners, the long-term energy savings, convenience, and comfort offered by a Sensi thermostat make it a worthwhile investment for their homes.
Whether you choose professional installation or decide on a DIY approach for setting up your new Sensi thermostat will depend on factors such as your technical skills and comfort level with HVAC systems. No matter which route you take for installation, with proper setup and use of this smart technology, you can look forward to enjoying these benefits in no time at all.
Things to Consider Before Installing a Sensi Thermostat
Before diving into the sensi thermostat installation process, there are a few important factors to consider to ensure that the installation goes smoothly and efficiently.
Compatibility With HVAC System
One of the most crucial things to consider before installing a Sensi Thermostat is whether it is compatible with your HVAC system. It’s important to check if your heating and cooling system is compatible with the Sensi Thermostat, as some older systems may not be compatible with smart thermostats. You can easily check compatibility by visiting the Sensi website or contacting their customer support for assistance.
Power Source
Another factor to consider is the power source for your new Sensi Thermostat. Some thermostats require a common wire (C-wire) for power, while others can operate without one. Before installation, it’s essential to determine whether your HVAC system has a C-wire available. If not, you may need to install a C-wire adapter or seek professional assistance.
Location of Thermostat
The location of your current thermostat and whether it’s suitable for the new Sensi Thermostat should also be considered. The ideal location for a thermostat is on an interior wall away from direct sunlight, drafts, and other heating or cooling sources. Ensuring proper placement can help the thermostat accurately read indoor temperatures and provide optimal performance.
Network Connectivity
Since Sensi Thermostats have Wi-Fi capabilities, it’s important to consider network connectivity before installation. Ensure that you have a strong Wi-Fi signal near the location of the thermostat in order to connect it to your home network without any issues.
User Skill Level
Lastly, consider your skill level when it comes to DIY projects and technical installations. While many homeowners successfully install their own Sensi Thermostat, some may prefer professional installation for peace of mind. Assessing your comfort level with technology and following instructions will help determine whether DIY installation is right for you.
Tools and Materials Needed for Sensi Thermostat Installation
When it comes to installing a Sensi Thermostat, there are a few essential tools and materials that you will need to ensure a successful installation. Before getting started, it’s important to gather everything you need to avoid any interruptions during the process. Here’s a list of the necessary items for Sensi Thermostat installation:
1. Screwdriver: A screwdriver is essential for removing the existing thermostat from the wall and securing the new Sensi Thermostat in place. Make sure you have both flat head and Phillips head screwdrivers on hand, as different thermostats may require different types of screws.
2. Voltage Tester: Before beginning any work on your thermostat, it’s crucial to test for voltage to ensure safety. A voltage tester will help you determine if there is electrical current running through the wires, allowing you to proceed with caution.
3. Wire Cutter and Stripper: Depending on your existing wiring setup, you may need a wire cutter and stripper to trim and prepare the wires for connection to the new Sensi Thermostat.
4. Level: To ensure that your Sensi Thermostat is installed straight and level on the wall, using a level tool will be indispensable.
5. Labeling Materials: It’s crucial to label each wire according to its corresponding terminal on your old thermostat before removing it. This will help streamline the installation process when connecting the wires to your new Sensi Thermostat.
6. Sensi Thermostat: Of course, you will need the actual Sensi Thermostat unit itself, complete with any accompanying accessories or components as specified in the product manual.
7. Batteries (optional): If your HVAC system requires backup power or if Wi-Fi connectivity goes down, having batteries as a backup power source can be beneficial.
By ensuring that you have all of these tools and materials prepared before starting your Sensi Thermostat installation, you can streamline the process and minimize any potential hiccups along the way. Additionally, referring to the product manual provided with your Sensi Thermostat can provide clarity on any specific tools or materials needed based on your HVAC system type or wiring configuration.
Step-by-Step Guide to Sensi Thermostat Installation
Installing a Sensi thermostat is a relatively straightforward process that can be completed in just a few simple steps. Here’s a step-by-step guide to help you through the installation process.
Turn Off Power
Before you begin the installation process, it is important to turn off the power to your heating and cooling system at the breaker panel. This will ensure your safety as you work on the installation.
Remove Old Thermostat
Next, carefully remove your old thermostat from the wall. This usually involves unscrewing it from its mounting plate and disconnecting the wires attached to it. Be sure to label each wire as you disconnect it to make reconnection easier.
Install New Mounting Plate
Once the old thermostat is removed, attach the new mounting plate for your Sensi thermostat to the wall using screws. Make sure it is level before securing it in place.
Connect Wiring
Carefully connect the labeled wires from your HVAC system to the corresponding terminals on the new Sensi thermostat. Some models may have built-in wire labels or color-coded terminals for easy installation.
Attach Sensi Thermostat
After wiring is connected, simply snap or screw your Sensi thermostat onto the mounting plate. Make sure it is securely in place before proceeding.
By following these simple steps, you can complete your Sensi thermostat installation with ease and start enjoying all of its energy-saving benefits in no time. Remember, if you encounter any issues during installation, consult the troubleshooting section of your manual or reach out to customer support for assistance with any sensi thermostat installation concerns.
Troubleshooting Common Issues During Installation
Identifying Common Installation Issues
During the installation process of a Sensi thermostat, it is not uncommon to encounter some common issues. These issues can include wiring problems, compatibility issues with the HVAC system, or connectivity issues with the Wi-Fi network. It is important to be aware of these potential obstacles and to know how to troubleshoot them effectively in order to ensure a successful installation.
Wiring Problems
One common issue that homeowners may face during Sensi thermostat installation is related to the wiring. This can include mismatched or outdated wiring and may require some adjustments. It is important to carefully follow the manufacturer’s instructions and properly identify the existing wiring in order to avoid any potential problems. If uncertain about the wiring, it may be best to consult with a professional electrician for assistance.
Compatibility Issues
Another common issue is compatibility with the HVAC system. Not all heating and cooling systems are compatible with every type of thermostat, including smart thermostats like Sensi. Before beginning the installation process, it is crucial to verify the compatibility of the Sensi thermostat with your specific HVAC system. The manufacturer’s website provides a helpful compatibility tool that can assist in determining if your system is compatible.
Wi-Fi Connectivity Problems
In addition, users may experience challenges in connecting their Sensi thermostat to their home Wi-Fi network. This can hinder access and control of the thermostat through a smartphone or other smart devices. To address this issue, it is essential to ensure that the Wi-Fi signal strength in the installation location is strong enough for reliable connectivity. Additionally, double-checking Wi-Fi network credentials and following instructions for connection provided by Sensi can help troubleshoot connectivity problems.
Sensi Customer Support
If troubleshooting these common issues becomes challenging during installation, it’s always beneficial to reach out directly to Sensi customer support for assistance. They have knowledgeable representatives who can provide expert guidance and troubleshooting tips tailored specifically for your situation. Their support team can offer valuable insights into resolving any technical issues that arise during installation.
By being aware of these common issues and understanding how to troubleshoot them adequately, homeowners can navigate through any challenges they encounter during their Sensi thermostat installation process more confidently and successfully.
Connecting Sensi Thermostat to Wi-Fi and Smart Home Systems
Connecting your Sensi thermostat to your Wi-Fi network and smart home systems is a crucial step in maximizing its efficiency and convenience. By integrating it with your smart home technology, you can have greater control over the temperature of your home, even when you’re away. This section will provide a step-by-step guide on how to connect your Sensi thermostat to Wi-Fi and various smart home systems.
To begin the process of connecting your Sensi thermostat to Wi-Fi, you will need to download the Sensi app on your smartphone or tablet. The app is available for both iOS and Android devices, making it accessible to a wide range of users. Once the app is downloaded, follow the instructions to create an account and log in.
Once logged in, you will be prompted to add a new device. Select “Thermostat” from the list of options and follow the on-screen instructions to connect your Sensi thermostat to your Wi-Fi network. Make sure that you have your Wi-Fi network name and password on hand as you will need this information during the setup process.
After successfully connecting your Sensi thermostat to Wi-Fi, you can now integrate it with various smart home systems such as Amazon Alexa, Google Assistant, Apple HomeKit, and others. Each system may have slightly different integration processes, so it’s important to refer to the specific instructions provided by the manufacturer of your smart home system.
Integrating your Sensi thermostat with smart home systems allows you to control the temperature using voice commands or through the respective apps. For example, if you have an Amazon Alexa device, you can simply say “Alexa, set the living room temperature to 72 degrees” and it will adjust accordingly. This level of automation adds a new layer of convenience and energy efficiency to your daily life.
| Step | Instructions |
|---|---|
| 1 | Download the Sensi app on your smartphone or tablet. |
| 2 | Create an account and log in. |
| 3 | Select “Thermostat” from the list of options within the app. |
| 4 | Follow on-screen instructions to connect Sensi thermostat to Wi-Fi network. |
| 5 | Integrate with smart home systems such as Amazon Alexa or Google Assistant. |
Programming and Setting Up Your Sensi Thermostat
Sensi thermostats are a popular choice for homeowners looking to upgrade their HVAC systems with smart technology. Once you have successfully installed your Sensi thermostat, the next step is programming and setting it up to ensure optimal performance and energy savings. Here is a step-by-step guide to programming and setting up your Sensi thermostat.
- Start by downloading the Sensi app on your smartphone or tablet. This app will allow you to control your thermostat remotely, set schedules, and customize settings.
- Once you have downloaded the app, follow the prompts to create an account and connect your Sensi thermostat to your Wi-Fi network. This step is crucial for accessing the full range of features offered by the Sensi thermostat.
- After connecting your thermostat to Wi-Fi, you can begin programming it according to your schedule and preferences. Use the app to set specific temperature schedules for different times of day, such as mornings, evenings, and weekends.
Tips for Maximizing Energy Savings With Sensi Thermostat
- Take advantage of the “Geofencing” feature in the Sensi app, which uses your smartphone’s location to automatically adjust the temperature when you leave or return home. This can help save energy when no one is at home.
- Consider enabling the “Smart Alerts” feature in the app, which will notify you of any extreme temperature or humidity changes in your home. This can help prevent potential issues with your HVAC system.
Professional Installation vs. DIY Installation for Sensi Thermostat
When it comes to programming and setting up your Sensi thermostat, professional installation may not offer significant advantages over DIY installation unless you are unfamiliar with using apps or dealing with smart technology.
By following these steps and utilizing all available features of your Sensi thermostat, you can truly maximize its energy-saving potential while enjoying a comfortable home environment. Not only does proper programming and setup ensure that your heating and cooling needs are met efficiently, but they also contribute to reducing energy usage and costs over time.
Tips for Maximizing Energy Savings With Sensi Thermostat
One of the most appealing features of a Sensi thermostat is its potential to help homeowners save money on energy bills. By maximizing energy savings, users can not only reduce their carbon footprint but also improve the efficiency of their home heating and cooling systems. Here are some tips for getting the most out of your Sensi thermostat and achieving significant energy savings.
Firstly, take advantage of the scheduling features offered by your Sensi thermostat. By programming specific temperature settings for different times of the day, you can ensure that your HVAC system is not working unnecessarily when no one is home or during sleeping hours. For example, you can set the temperature to be slightly higher during the summer months when you’re at work and lower it just before you get back home.
Additionally, consider installing sensors in different rooms of your home to allow for more precise temperature control. These sensors will enable your Sensi thermostat to adjust temperatures based on occupancy, making sure that only occupied areas are being heated or cooled as needed. This can lead to substantial energy savings over time by preventing overheating or overcooling of unoccupied spaces.
Furthermore, regularly checking and replacing air filters is essential for optimizing your HVAC system’s performance and efficiency. A dirty filter can restrict airflow and force your system to work harder, using more energy in the process. By keeping your filters clean, you can ensure better airflow and reduce strain on your system.
Another important tip for maximizing energy savings with a Sensi thermostat is to take advantage of its compatibility with smart home systems. By integrating your thermostat with other smart devices in your home, such as smart lights or blinds, you can create a comprehensive energy-saving strategy that works seamlessly together.
Finally, consider conducting regular maintenance and servicing of your HVAC system to keep it running efficiently. Whether it’s cleaning coils or checking refrigerant levels, routine maintenance will help ensure that your system operates at peak performance and uses minimal energy.
| Tips | Details |
|---|---|
| Utilize Scheduling Features | Set different temperature settings for various times of the day to optimize HVAC usage. |
| Install Room Sensors | Allow for more precise temperature control based on room occupancy |
| Replace Air Filters Regularly | Keeps airflow optimal and reduces strain on HVAC system. |
| Integrate with Smart Home Systems | Create a comprehensive energy-saving strategy by connecting with other smart devices. |
Professional Installation vs DIY Installation for Sensi Thermostat
When it comes to installing a Sensi thermostat, homeowners often face the decision of whether to hire a professional or attempt a do-it-yourself installation. Both options have their advantages and drawbacks, which should be carefully considered before making a decision.
Professional installation of a Sensi thermostat offers the peace of mind that comes with knowing the job is being done by an experienced technician. This can be particularly beneficial for those who are not comfortable working with electrical systems or who lack the necessary tools and expertise for the installation process. Professional installers can also ensure that the thermostat is set up correctly and functioning optimally.
On the other hand, professional installation can be relatively costly, often adding to the overall investment in a smart home system. Additionally, scheduling an appointment and waiting for a technician may result in delays that some homeowners find inconvenient.
DIY installation, on the other hand, enables homeowners to save money on installation costs and provides them with the satisfaction of completing the task themselves. Many users find Sensi thermostats relatively easy to install, especially with comprehensive instructions provided by Emerson-the parent company of Sensi.
However, DIY installation may not be suitable for everyone. Those who are unfamiliar with electrical work or lack confidence in their technical abilities may find the process daunting. Furthermore, mistakes made during DIY installation could lead to damage or malfunctions that might require professional assistance to rectify.
| Professional Installation | DIY Installation |
|---|---|
| Peace of mind | Cost-saving |
| Expertise | Satisfaction of completing task |
| Costly | Potential for mistakes |
Conclusion
As we conclude our discussion on Sensi Thermostat Installation, it is evident that the future of smart thermostat technology is here to stay. With the increasing awareness and emphasis on energy conservation and efficiency, the demand for smart thermostats like Sensi continues to grow. The ease of installation, user-friendly interface, and energy-saving capabilities make it a top choice for homeowners looking to upgrade their HVAC systems.
The role of Sensi thermostat installation in this technological advancement cannot be understated. By providing users with a step-by-step guide and troubleshooting tips, Sensi has empowered homeowners to take charge of their energy usage without relying on professional installers. This DIY approach not only saves time and money but also promotes a sense of control and understanding over one’s home comfort system.
Looking ahead, the integration of Sensi thermostat with Wi-Fi and smart home systems further solidifies its position in the marketplace. The ability to remotely control and monitor the temperature settings from a smartphone or through voice commands aligns with the growing trend of interconnected devices in modern homes. Additionally, the compatibility with various smart home platforms ensures that Sensi can easily adapt to evolving technologies and remain relevant for years to come.
In conclusion, Sensi thermostat installation represents a significant leap towards a more sustainable and efficient future for residential heating and cooling systems. Its user-friendly features, energy-saving capabilities, and adaptability to smart home technologies make it an ideal choice for homeowners seeking to upgrade their thermostats. As smart thermostat technology continues to advance, Sensi remains at the forefront, providing innovative solutions that prioritize convenience, comfort, and conservation of energy.